


The Delta Force Space City Dorm 2 spawn guide starts with one rule: take map control before you take loot. Spawning at Employee Dormitory No. 2 (Dorm 2, or in community callouts) puts you beside interior routes to Central Control and the Core Area. If you stop for ground-floor lockers or loose loot, you can be pinched before the two-minute mark. Use this opening three-minute route to move through the glass corridor, reach the 2F catwalk, counter Dorm 1 rushers, and return for safer back-looting.
In Hazard Operations, the opening 180 seconds are about tempo, line-of-sight awareness, and vertical control. The timings below are a practical route, not a reason to ignore audio, radar, or an enemy already holding the angle.
Dorm 2 Spawn: The Key Advantage and Risk
Space City is built around dense industrial architecture, sharp corners, and strong vertical routes. The opening flow around Dorm 2 is shaped by two residential complexes: Employee Dormitory No. 1 (Dorm 1) and Employee Dormitory No. 2 (Dorm 2).
- Dorm 1 is closer to Central Control. If both squads sprint along ground corridors, Dorm 1 arrives approximately 3 to 5 seconds earlier.
- Dorm 2 has faster, safer access to the interior stairwell and the 2F elevated perimeter catwalk.
- The Dorm 2 entrance corridor has transparent glass along its right flank, exposing operators who linger to exterior sightlines.
Conclusion: do not contest Dorm 1 head-on through the main ground-level door. Use the side exit, then convert Dorm 2’s vertical route into the fight.
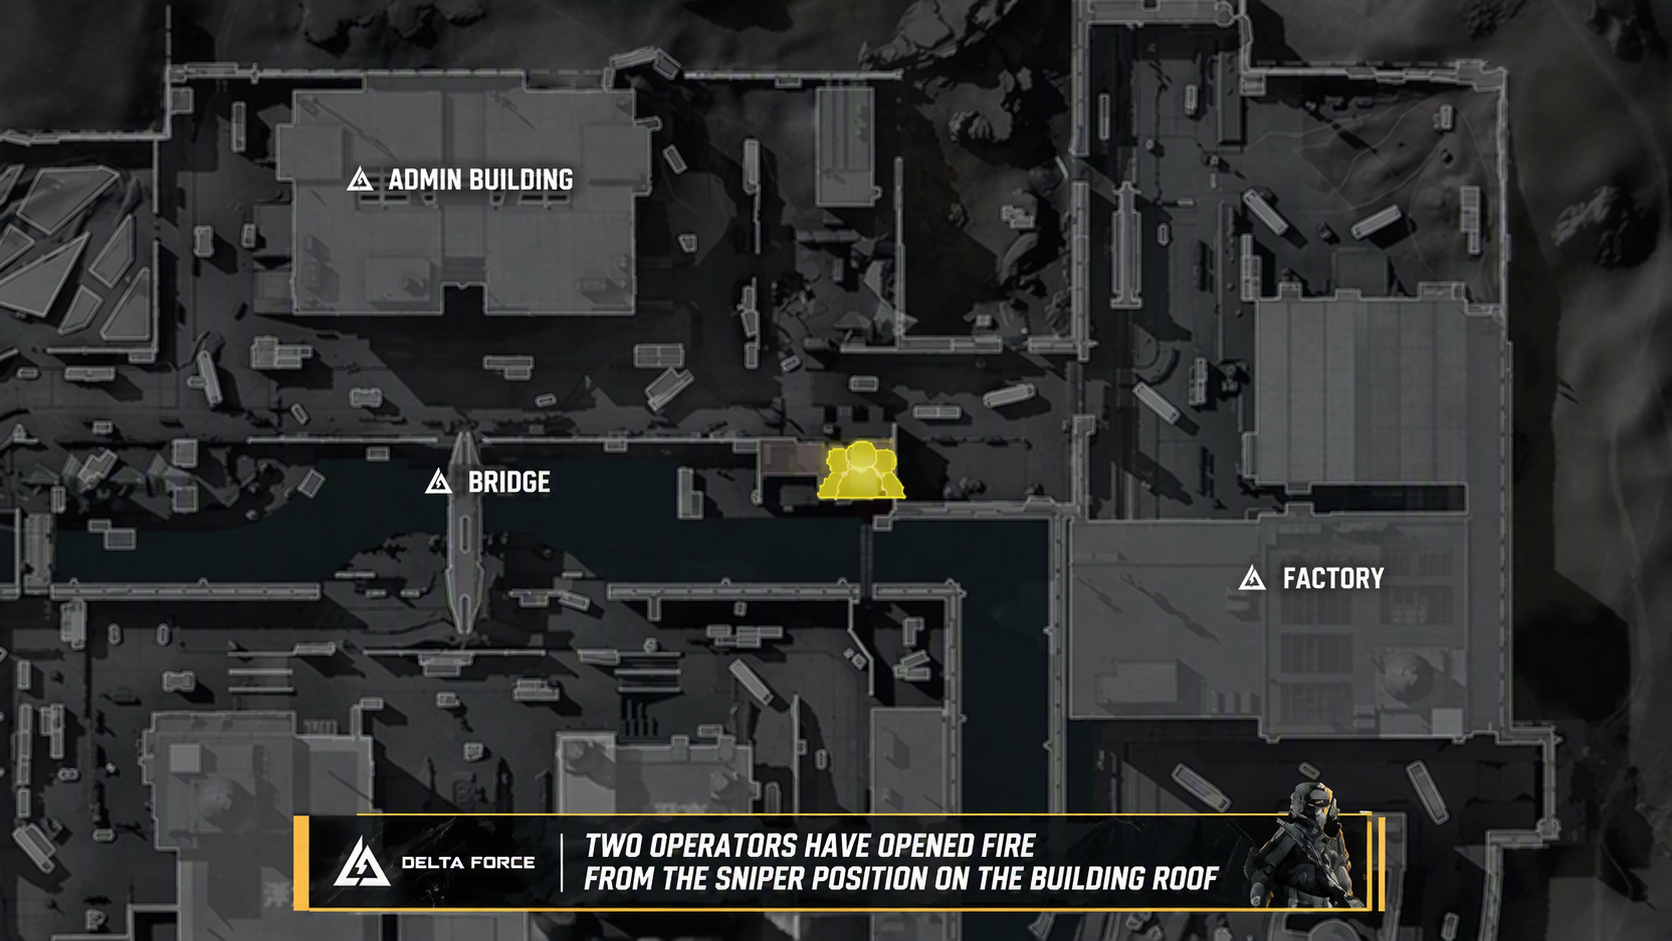
Figure 1: Space City Tactical Map Overview — Spawning at Employee Dormitory No. 2 and key approach vectors toward Central Control.
Dorm 2 First 3 Minutes: Decision Matrix
| Time | Waypoint | Objective | Threat | Action rule |
|---|---|---|---|---|
| 0:00–0:15 | Glass corridor | Reach the facility | Exterior sightlines through glass | Slide-sprint; never linger or reload. |
| 0:15–0:28 | Side door | Check Central Control | Dorm 1’s earlier angle | Skip the front door; peek from cover. |
| 0:28–0:50 | Interior stairs | Take 2F vertical control | Stair flankers or radar pings | Sprint upward; use utility if needed. |
| 0:50–1:30 | 2F catwalk | Cut off rotations | Players crossing below | Bypass the server room and hold. |
| 1:30–2:00 | Core overlook | Inspect switches and doors | Teams in the Core Area | Engage from high ground. |
| 2:00–3:00 | CEO / Blue Room approach | Anchor and clear | Late perimeter rotations | Use utility; then back-loot. |
Step-by-Step Dorm 2 Early Rush Route
Step 1 (0:00–0:15): Clear the Glass Corridor
- The instant you spawn outside Dorm 2, start moving. Do not check your tactical map or adjust attachments in the open yard.
- Tactical slide-sprint through the exterior doorway and straight into the long ground-floor corridor.
- The glass along the right side is transparent. Do not pause, heal, reload, or repack magazines there; opponents can see into the hallway before you reach hard cover.
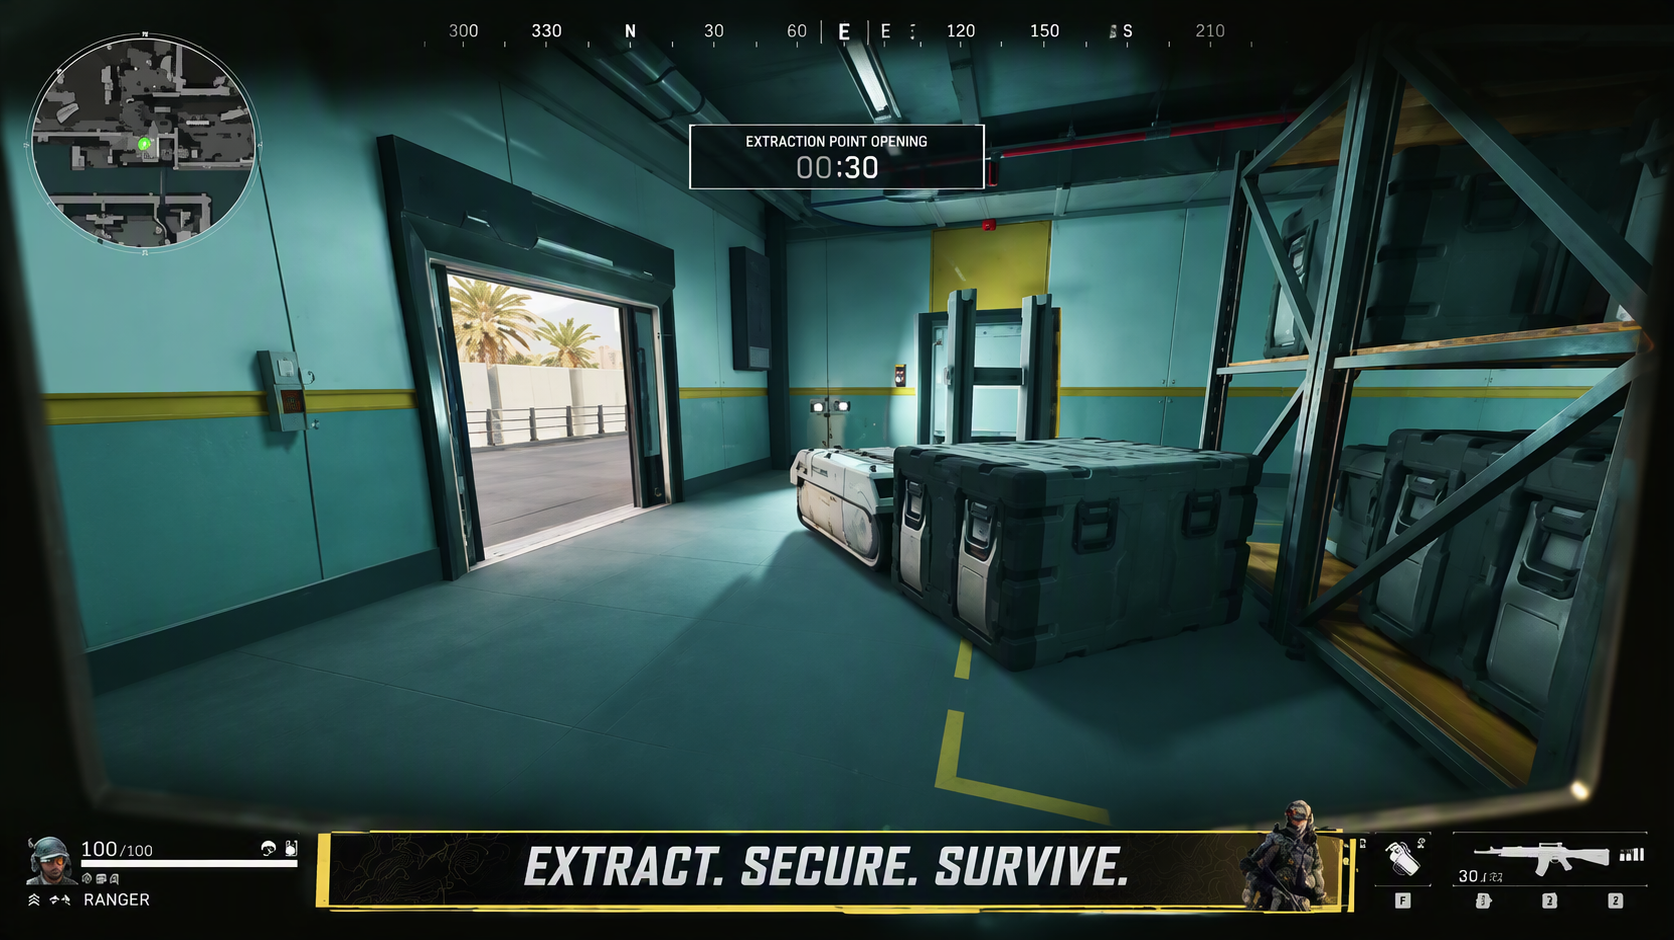
Figure 2: Ground-Floor Glass Corridor — Sprinting through the entrance hallway while avoiding lingering near transparent exterior windows.
Step 2 (0:15–0:28): Take the Side Exit
- At the corridor’s end, choose the side doorway rather than the direct front door.
- The front door exposes you to rifles that Dorm 1 players may already be pre-aiming. The side exit gives you natural hard cover and a cleaner line of sight toward Central Control.
- Pre-aim at head height. If you see no enemy, skip the adjacent ground-floor room and continue to the interior stairs.
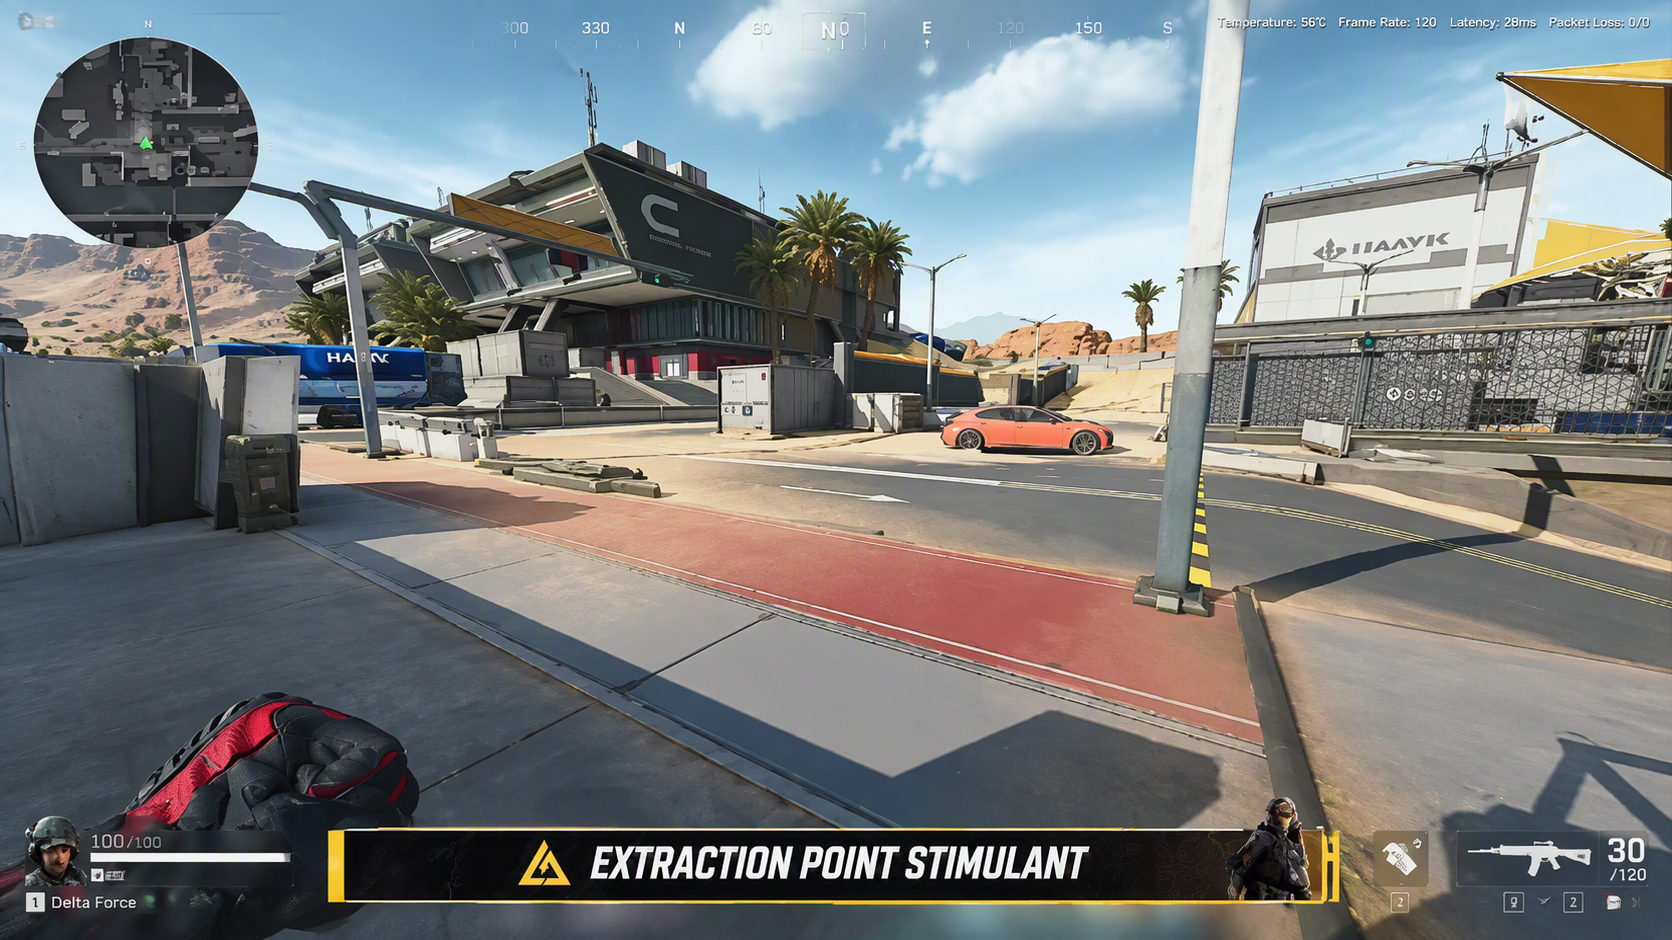
Figure 3: Side Exit & Perimeter Advance — Exiting through the side passage and pushing down the perimeter roadway toward Central Control.
Step 3 (0:28–0:50): Sprint to the 2F Stairwell
- Sprint up the interior staircase with your crosshair at corner-clearing height.
- Watch the HUD radar and listen for directional audio rings. If footsteps appear, prime a fragmentation or thermite grenade, bounce it into the doorway or upper landing, and push off the explosion.
- If the route is clear, bypass the 2F server/computer room (机房). Searching computers now costs your rotation advantage.
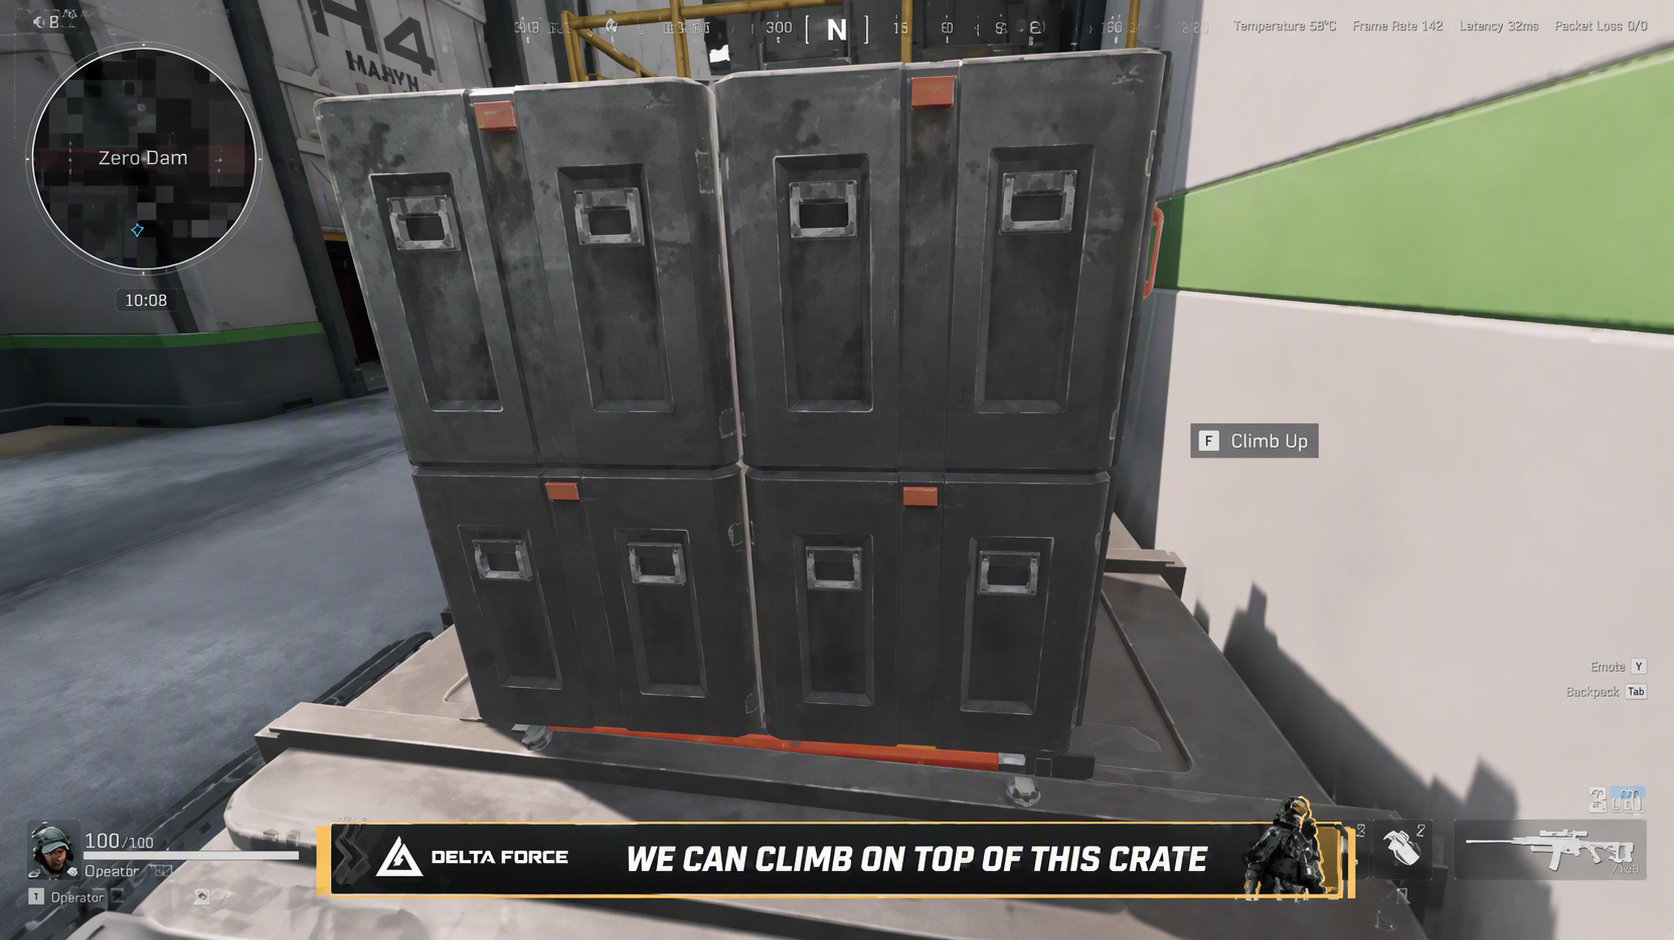
Figure 4: Rapid Vertical Ascent — Utilizing staging crates and stair structures to quickly establish high-ground access.
Step 4 (0:50–1:30): Hold the Elevated Catwalk
- Anchor on the 2F catwalk overlooking the lower corridor connecting Dorm 1 and Central Control.
- Keep your crosshair on the choke points that enemy operators must cross. Hold the cutoff for 15 to 20 seconds so players who stopped to loot ground-level jackets or drawers enter your pre-aimed lane.
- If no targets appear, the immediate flank is secured. Rotate along the high corridor toward the Core Area.
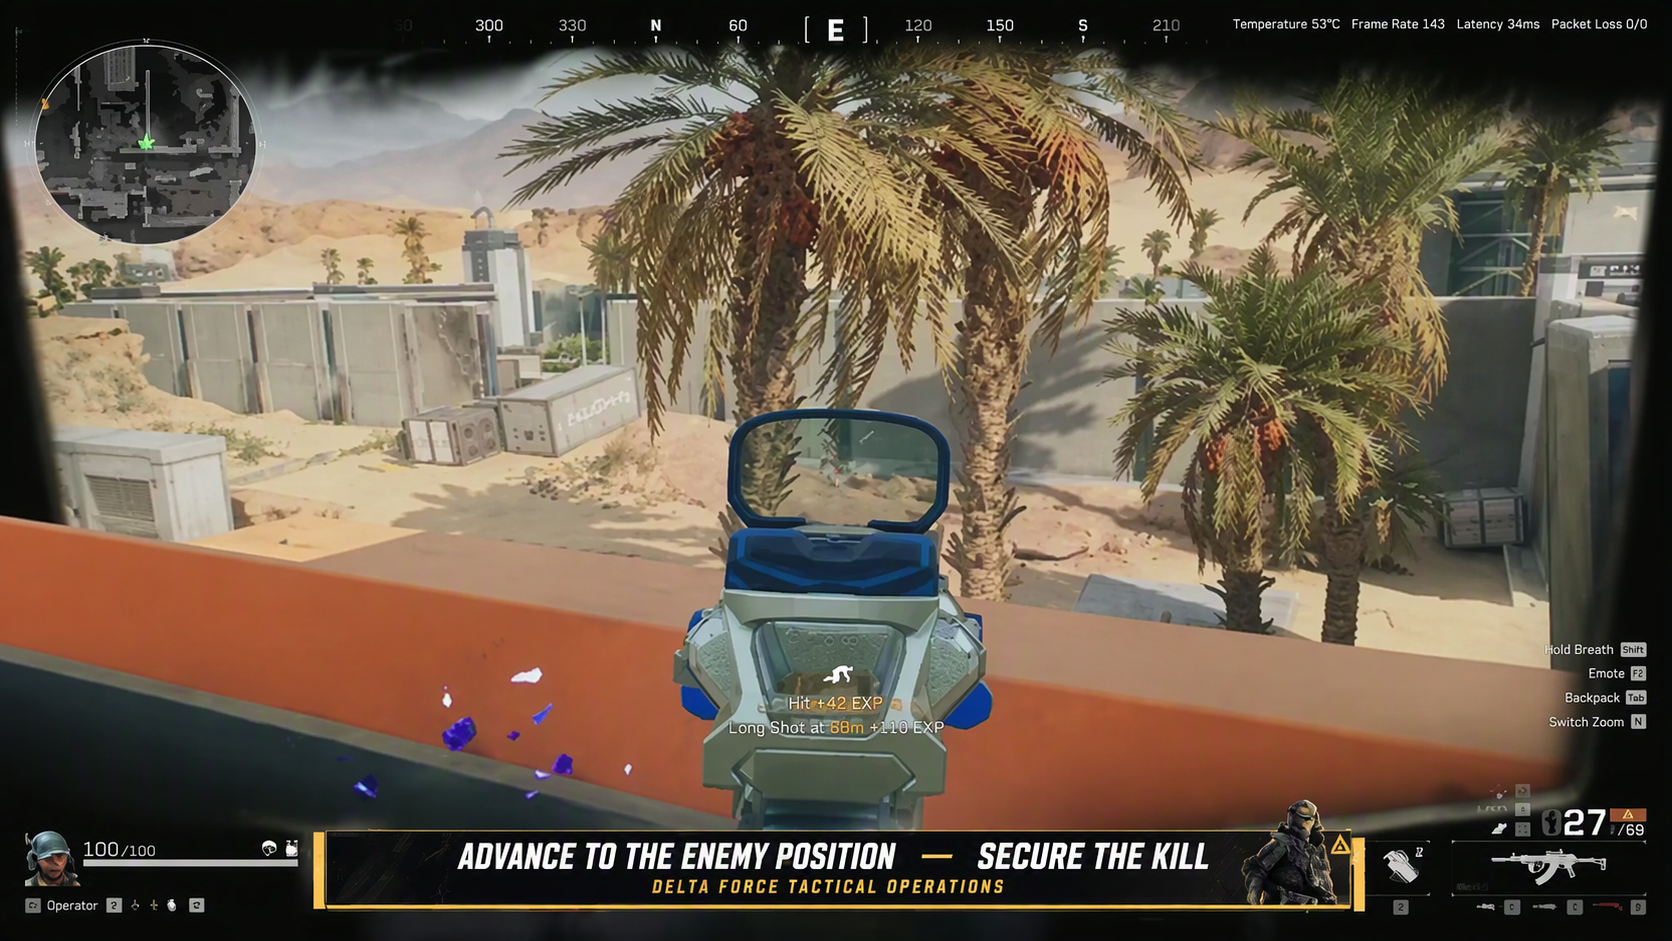
Figure 5: Elevated Cutoff Anchor — Holding high-ground barrier angles to suppress and intercept lower-level enemy rotations.
Step 5 (1:30–2:00): Watch the Core Area from High Ground
- Reach the elevated overlook above the central Core Area between roughly 1:30 and 2:00.
- Approach the railing carefully; avoid skylining yourself against the upper lights.
- Check the Core floor for opponents pulling extraction or vault switches (拉闸) and unlocking keycard doors. Firing downward gives you clear headshot profiles while enemies below must aim up with limited cover.
- If Core is silent, listen for movement between 1F and 2F; teams may be rotating through adjacent lower corridors.
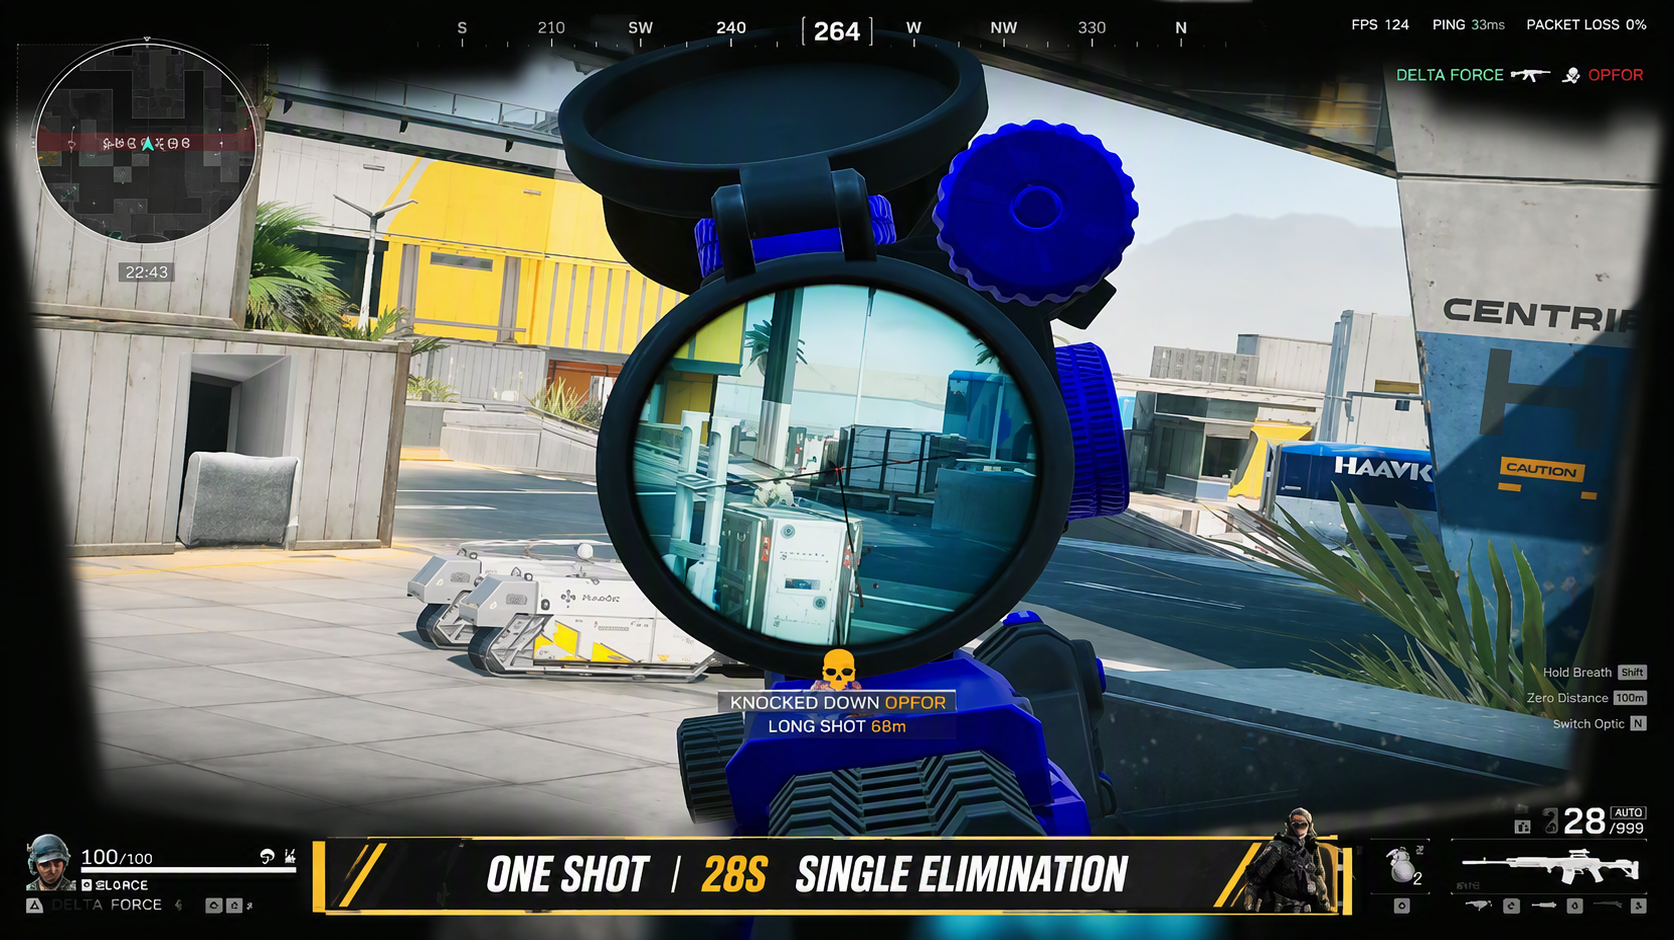
Figure 6: Central Control Scope Pre-Aim — Monitoring Central Control facility entrances from an elevated vantage during the 28–35 second window.
Step 6 (2:00–3:00): Lock Down Chokepoints, Then Back-Loot
- Expect teams from outer dorms and perimeter spawns to reach high-tier rooms during this window.
- Anchor a corner angle or defensive room covering approaches to the CEO Office or the chambers beneath Blue Room. The position should let you advance or fall back into cover.
- Never jump down when you hear footsteps on 1F. Throw grenades down to flush enemies into the open or force an awkward push.
- Once the area is confirmed clear, backtrack for the server room, offices, safes, and high-tier red-item spots.
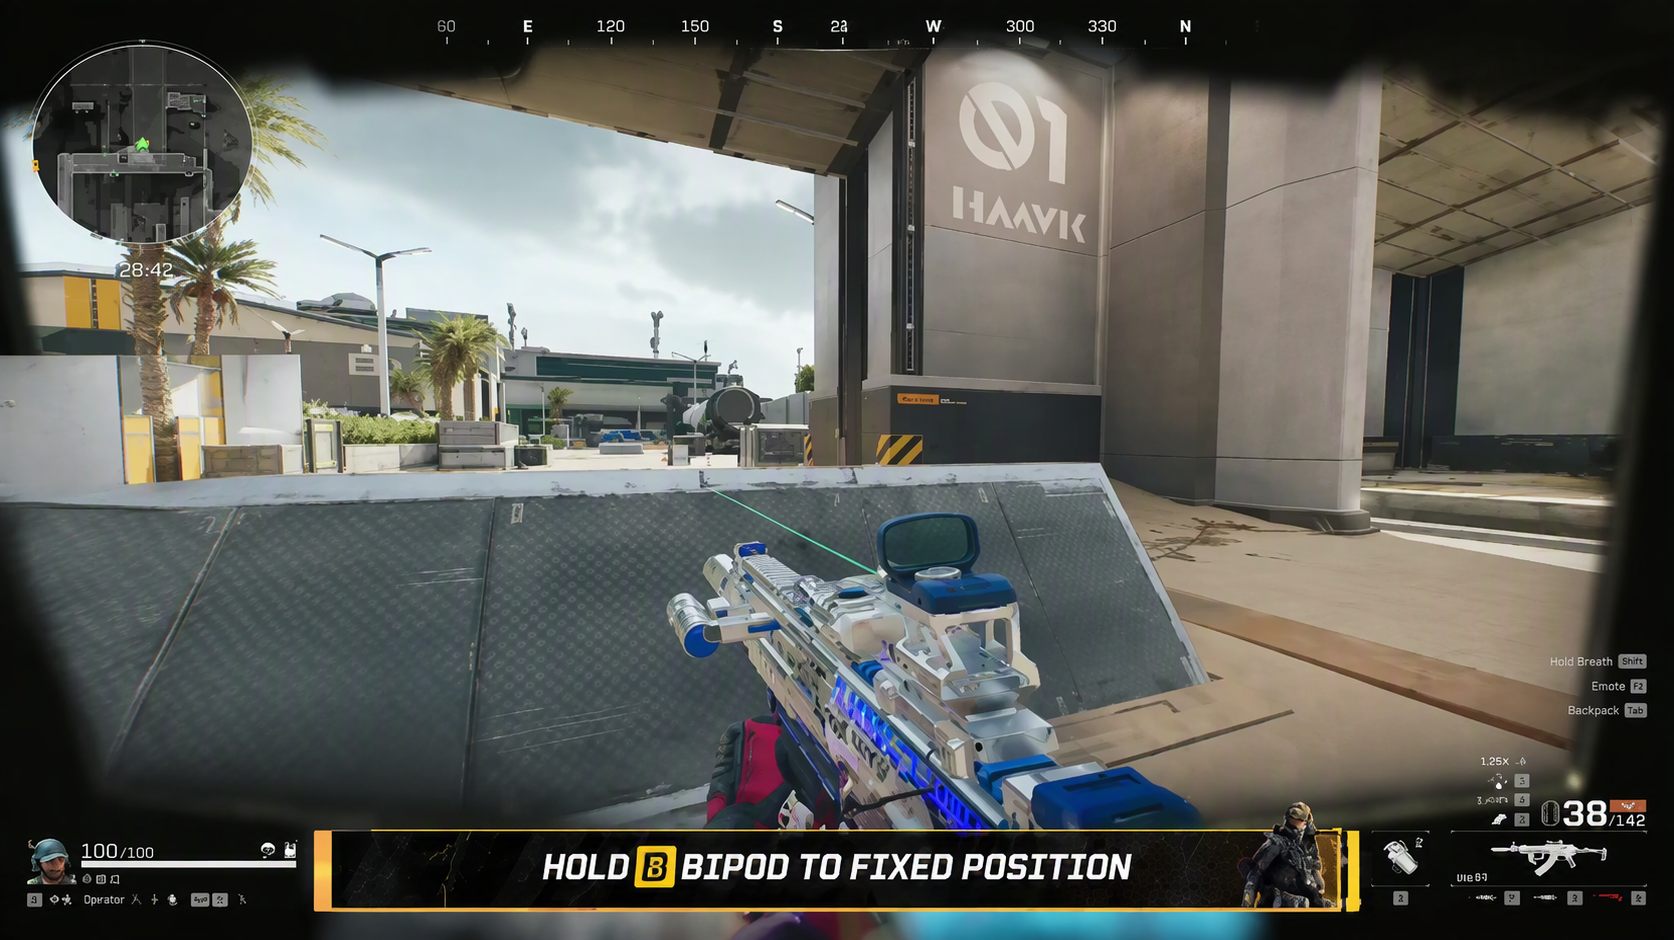
Figure 7: High-Ground Perimeter Lockdown — Securing surrounding rotation lanes and Central Control approaches before commencing safe back-looting.
Four Rules for Every Dorm 2 Spawn
1. Choose early speed over early loot.
Every container searched in the first 90 seconds costs tactical positioning. Containers remain available; map control can disappear when another squad takes the high ground.
2. Treat the glass as a hazard, not cover.
The Dorm 2 glass hallway exposes you. Keep moving until you reach interior hard cover.
3. Never contest Dorm 1 at ground level.
Dorm 1 has the geometric advantage toward Central Control. Scout from the side door, then take 2F and fight from above.
4. Use utility to clear vertical lanes.
Fragmentation and thermite grenades force enemies out of lower corners without making you give up the catwalk.
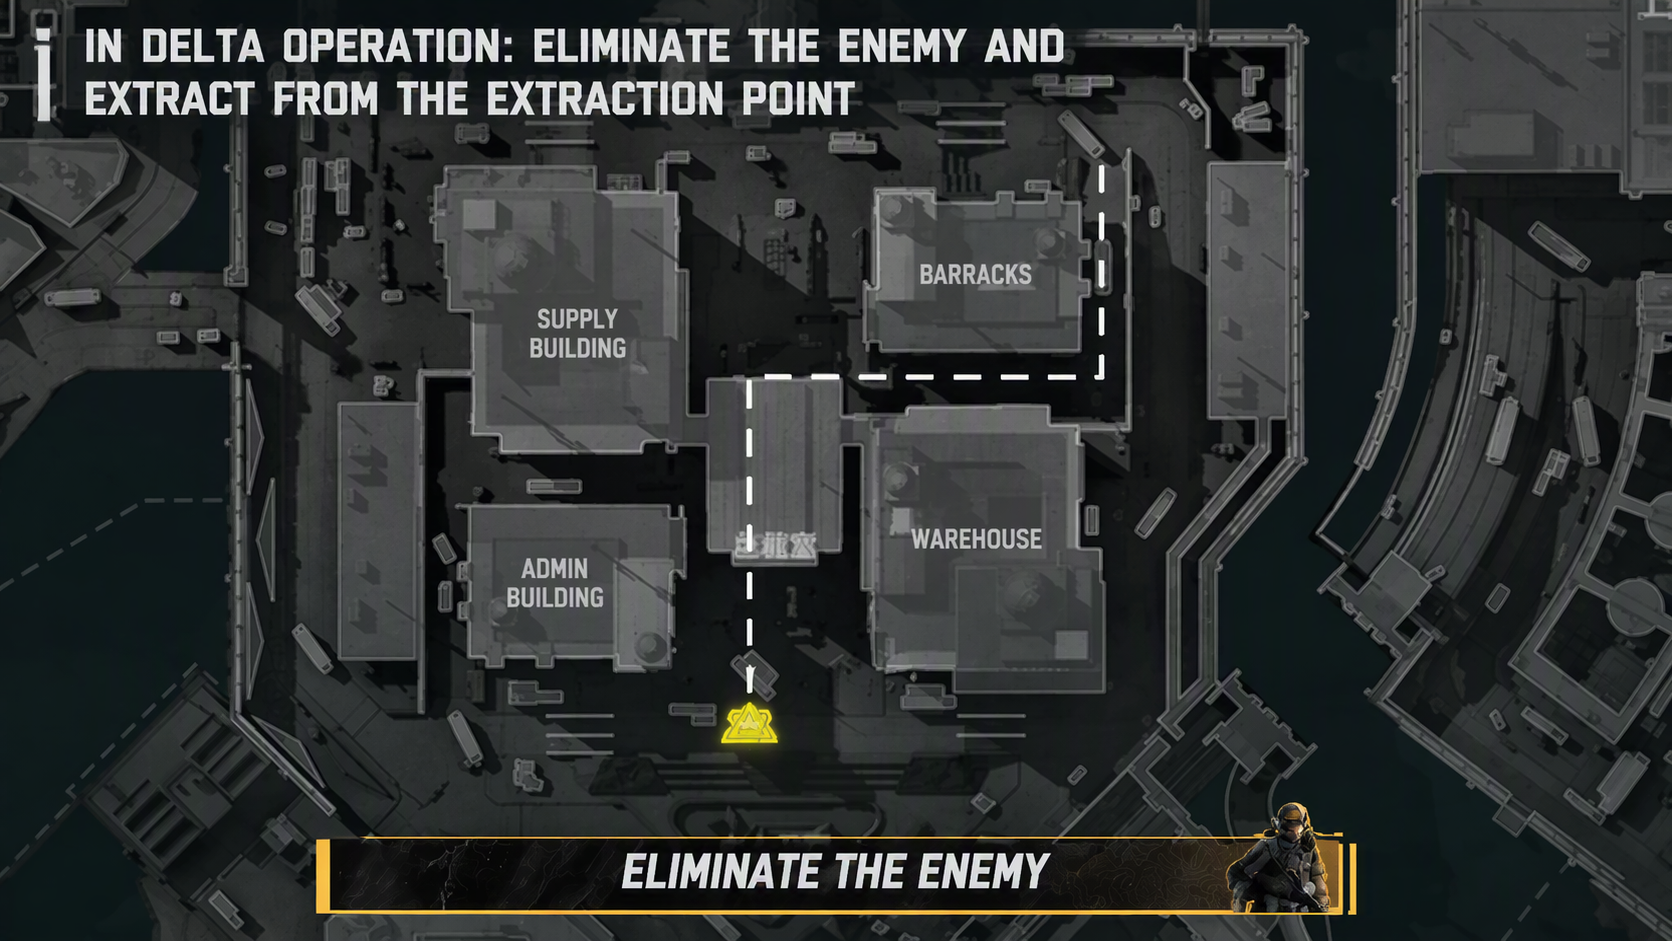
Figure 8: Tactical Formula Rotation Route — High-ground navigation schematic linking the exterior elevated approach to Core Area platforms.
Recommended Loadout for Space City Interior Fights
- Primary weapon: Rapid-fire assault rifles such as the K416, CAR-15, CI-19, or AS Val, or a compact SMG such as the Vector. Prioritize fast ADS and hip-fire control for close hallways.
- Optic: A low-magnification red dot or 1x–3x hybrid optic covers stairwells and elevated catwalk sightlines.
- Utility: Bring at least two lethal grenades, using fragmentation or thermite to flush staircases and doorway corners.
- Ammunition: In confidential or higher-difficulty raids, use Tier 4 purple ammunition for competitive time-to-kill against armored rushers.
FAQ: Space City Dorm 2 Spawn Guide
What does “No. 2” mean in Delta Force callouts?
“No. 2” is the standard abbreviation for Employee Dormitory No. 2, a major spawn location on Space Cit.
Why avoid the front door at the end of the glass corridor?
The front door funnels your squad into sightlines that Dorm 1 rushers may already be holding. The side exit gives you cover and a safer angle toward Central Control.
When should you loot the 2F server room and safes?
Start back-looting at roughly 2:30 to 3:00, after holding the catwalk, checking the Core Area, and neutralizing early rotating teams.
What should you do when you hear footsteps below the 2F catwalk?
Do not drop down. Hold the elevated angle and throw lethal utility down stairwells or floor openings to flush the enemy.
What if Dorm 1 already controls Central Control?
Do not push at ground level. Disengage toward the interior stairs, secure 2F vertical control, and catch the squad during its next rotation from above.
Plan Your Next Space City Deployment
Before your next deployment, use DeltaForceTools.gg to review interactive 3D map layouts, extraction routes, and weapon builds. Route knowledge and a setup suited to close interior fights give you the best chance to convert a Dorm 2 spawn into an early advantage—and a safe extraction.
How to Follow This Operator Leak with DFT & BuffBuff
Open Delta Force Tools → Home
Map, Auction Prices & Weapon Builds - Delta Force Tools
Visit the homepage to check more Delta Force updates, map tools, and other useful game information related to the new Operator.
Top-Up Smartly (Optional).
Delta Force Mobile and PC Version Top Up | Buy Delta Force Coins Up to 54% OFF
If you want to prepare for the new season in advance, BuffBuff offers official Delta Force top-ups with limited-time discounts, making it easier to stock up on items and resources.